class: left, middle, inverse, title-slide # Reproducible Reports with R Markdown ### Jessica Minnier, PhD & Meike Niederhausen, PhD<br><span style="font-size: 80%;"><a href="https://www.ohsu.edu/xd/research/centers-institutes/octri/education-training/octri-research-forum.cfm">OCTRI Biostatistics, Epidemiology, Research & Design (BERD) Workshop</a> </span> ### <span style="font-size: 80%;">2019/07/18 & 2019/09/25 <br><br><br> <i class="fas fa-link "></i> slides: <a href="http://bit.ly/berd_rmd">bit.ly/berd_rmd</a> <br> <i class="fas fa-file-pdf "></i> pdf: <a href="http://bit.ly/berd_rmd_pdf">bit.ly/berd_rmd_pdf</a></span> --- layout: true <!-- <div class="my-footer"><span>bit.ly/berd_tidy</span></div> --> --- # Load files for today's workshop .pull-left[ 1. Open slides [bit.ly/berd_rmd](http://bit.ly/berd_rmd) 1. Get project folder + Download zip folder at [bit.ly/berd_rmd_zip](http://bit.ly/berd_rmd_zip) + UNZIP completely (right click-> "extract all") + Open unzipped folder + Open (double click) `berd_rmarkdown_project.Rproj` + Inside RStudio 'Files' tab: click on file `00-install.R` and click "Run" to run all lines of code. ] .pull-right[ <center><img src="img/horst_rmarkdown_wizards.png" width="100%" height="100%"><a href="https://github.com/allisonhorst/stats-illustrations"><br>Allison Horst</a></center> ] --- # Learning objectives - Understand how to use literate programming for reproducible research - Basics of Markdown language - Learn how to create R Markdown files with code and markdown text - Turn R Markdown files into html, pdf, Word, or presentation files - Learn about reproducible project workflows - (If time allows) Learn some additional R Markdown tips --- class: middle, inverse # Why Reproducibility? - Evidence your results are correct. - Allow others to use our methods and results. >"An article about computational results is advertising, not scholarship. The actual scholarship is the full software environment, code and data, that produced the result." -- [(Claerbout and Karrenbach 1992)](http://sepwww.stanford.edu/doku.php?id=sep:research:reproducible:seg92) > Your closest collaborator is you six months ago, but you don't reply > to emails. -- [@gonuke](https://twitter.com/gonuke), quoting [@mtholder](https://twitter.com/mtholder) --- # Types of Reproducibility - **Computational reproducibility:** detailed information is provided about + *code, software, hardware and implementation details*. - **Empirical reproducibility:** detailed information is provided about + non-computational empirical *scientific experiments and observations [data]*. - **Statistical reproducibility:** detailed information is provided about + the choice of *statistical tests, model parameters, threshold values, etc*. [R Opensci Reproducibility Guide](https://ropensci.github.io/reproducibility-guide/sections/introduction/) --- # Software tool for reproducibility: *Literate Programming* >"These tools enable writing and publishing **self-contained documents that include narrative and code used to generate both text and graphical results**. >In the R ecosystem, knitr [R markdown] and its ancestor Sweave used with RStudio are the main tools for literate computing. Markdown or LaTeX are used for writing the narrative, with chunks of R code sprinkled throughout the narrative. IPython is a popular related system for the Python language, providing an interactive notebook for browser-based literate computing." [R Opensci Reproducibility Guide](https://ropensci.github.io/reproducibility-guide/sections/introduction/) --- # R Markdown = `.Rmd` file = Code + text `knitr` is a package that converts `.Rmd` files containing code + markdown syntax to a plain text `.md` markdown file, and then to other formats (html, pdf, Word, etc) <img src="img/ex_rmd.png" width="45%" align="top"> `\(\Rightarrow\)` <img src="img/ex_html.png" width="45%" align="top"> --- # knitr converts `.Rmd` -> `.md` (behind the scenes) .pull-left[ <img src="img/ex_rmd.png" width="100%" height="60%"> ] .pull-right[ <img src="img/ex_md.png" width="100%" height="60%"> ] --- # knitr converts `.Rmd` -> `.md` -> `.html` .pull-left[ <img src="img/ex_rmd_html.png" width="100%" height="60%"> ] .pull-right[ <img src="img/ex_html.png" width="100%" height="60%"> ] --- # knitr converts `.Rmd` -> `.md` -> `.pdf` .pull-left-40[ <img src="img/ex_rmd_pdf.png" width="100%" height="60%"> ] .pull-right-60[ <img src="img/ex_pdf2.png" width="100%" height="60%"> ] --- # knitr converts `.Rmd` -> `.md` -> `.doc` .pull-left[ <img src="img/ex_rmd_word.png" width="100%" height="60%"> ] .pull-right[ <img src="img/ex_word.png" width="50%" height="60%"> ] --- # knitr converts `.Rmd` -> `.md` -> slides .pull-left[ <img src="img/ex_ioslides.png" width="100%" height="60%"> ] .pull-right[ <img src="img/ex_slides.png" width="80%" height="60%"> ] --- # R Markdown vs. `knitr::knit()` <center><img src="img/knitr_workflow_sachsmc.png" width="80%" height="80%"></center>[Michael Sachs](https://sachsmc.github.io/knit-git-markr-guide/knitr/knit.html) --- # Good practices in RStudio __Use projects__ ([read this](https://r4ds.had.co.nz/workflow-projects.html)) - Create an RStudio project for each data analysis project - A project is associated with a directory folder + Sets *working directory* + Keep data files there + Keep scripts there; edit them, run them in bits or as a whole + Save your outputs (plots and cleaned data) there - Only use relative paths, never absolute paths + relative (good): `read_csv("data/mydata.csv")` + absolute (bad): `read_csv("/home/yourname/Documents/stuff/mydata.csv")` __Advantages of using projects__ - standardize file paths - keep everything together - a whole folder can be shared and run on another computer <!-- MEIKE'S SLIDES --> --- class: middle, inverse, center # Basic R Markdown example <center><img src="img/hex_rmarkdown-200x232.png"><img src="img/hex_knitr-200x232.png"></center> [https://www.rstudio.com/products/rpackages/](https://www.rstudio.com/products/rpackages/) --- # Create an R Markdown file (`.Rmd`) Two options: 1. click on File `\(\rightarrow\)` New File `\(\rightarrow\)` R Markdown... , or 1. in upper left corner of RStudio click on <img src="img/green_plus_create_file.png"> `\(\rightarrow\)` <img src="img/select_RMarkdown_option.png"> You should see the following text in your editor window: <center><img src="img/default_rmd_html_wide.png" width="62%" height="10%"></center> --- # Knit the .Rmd file *Before knitting the .Rmd file, you must first **save it**. * To **knit** the .Rmd file, either 1. click on the knit icon <img src="img/knit_icon.png"> at the top of the editor window 1. or use keyboard shortcuts * Mac: *Command+Shift+K* * PC: *Ctrl+Shift+K* 1. or use the `render()` command in Console - *See Extensions section for details* A new window will open with the html output. Remark: * The template .Rmd file that RStudio creates will knit to an html file by default * Later we will go over knitting to other file types --- # Compare the .Rmd file with its html output .pull-left[ .Rmd file <img src="img/default_rmd_html.png" width="84%" height="10%"> ] .pull-right[ html output <img src="img/default_html.png" width="64%" height="40%"> ] --- # Compare the .Rmd file with its html output <center><img src="img/screenshot_default_rmd2html_markedup.png" width="87%" height="70%"></center> <!-- --- --> <!-- # Show Output to html, word, pdf, other formats --> <!-- * j already has slides on this --> <!-- * will cover in YAML section --> --- class: middle, inverse # 3 types of R Markdown content 1. <span style="color:darkorange"> *Text*</span> 2. Code chunks 3. YAML metadata --- # Formatting text * Markdown is a markup language similar to html or LaTeX * All text formatting is specified via code .pull-left[ Text in editor: <img src="img/screenshot_format_text.png" width="100%" height="70%"> ] .pull-right[ Output: <!-- Time to learn how to format text using R Markdown! --> <!-- If I put two spaces --> <!-- at the end of a line it will force a line break and start a new line. --> <!-- *This text is in italics*, but _so is this text_. --> <!-- **Bold** also has __2 options__ --> <!-- ~~Should this be deleted?~~ --> <!-- `Sometimes text needs to be verbatim` --> <!-- >or even a block quote. --> <img src="img/screenshot_format_text_out.png" width="100%" height="70%"> ] --- # Headers * Organize your documents using headers to create sections and subsections * Later in the workshop we will cover + automatically numbering headers in output file for easy reference + easily creating a TOC based on the header names .pull-left[ Text in editor: <img src="img/screenshot_headers.png" width="35%" height="70%"> ] .pull-right[ Output: <img src="img/screenshot_headers_out.png" width="45%%" height="100%"> <!-- # Header 1 --> <!-- ## Header 2 --> <!-- ### Header 3 --> <!-- #### Header 4 --> <!-- ##### Header 5 --> <!-- ###### Header 6 --> ] --- # RStudio tip You can easily navigate through your .Rmd file if you use headers to outline your text <center><img src="img/screenshot_RStudio_headers.png" width="50%" height="100%"></center> --- # Unnumbered lists .pull-left[ Text in editor: <img src="img/screenshot_unnumbered_lists_code.png" width="100%" height="70%"> ] .pull-right[ * This is an **unnumbered list** + with *sub-items* - and *sub-sub-items*, - or even deeper. * You can use characters *, +, and - to create lists. * The order of the * characters is not important + and characters can be repeated. What *is* important is the *spacing*! + indent each * sub-level with a tab and make sure * there is a space between the character starting the list and the first bit of text, *otherwise the text won't be a new bullet in the list ] --- # Numbered lists .pull-left[ Text in editor: <img src="img/screenshot_numbered_lists_code.png" width="85%" height="60%"> ] .pull-right[ Output: <img src="img/screenshot_numbered_lists_out.png" width="57.5%" height="60%"> <!-- 1. This is a **Numbered list** --> <!-- i) with *sub-items* --> <!-- A. and *sub-sub-items*, --> <!-- 1. or even deeper. --> <!-- 2. You can also nest --> <!-- * unnumbered lists --> <!-- * inside numbered lists --> <!-- 3. Since --> <!-- a. sub-items can't be lettered. --> <!-- A cool feature is that --> <!-- 1. you can start --> <!-- 1. each numbered bullet --> <!-- 1. with 1. --> <!-- 1.just remember to --> <!-- *include the space after the period!* --> ] --- # Math, horizontal rule, and hyperlinks .pull-left[ Text in editor: <img src="img/screenshot_misc.png" width="85%" height="60%"> ] .pull-right[ Output: * __Mathematical formulas and symbols__ can be included using LaTeX, both as *inline equations* or *formulas*: + Use single `$` for inline equations: `\(y=\beta_0 + \beta_1x + \varepsilon\)` + Use double `$$` for centered formulas: `$$\hat{y}= \frac{3}{7} + 5 \mathrm{age} + 3^2 \cdot \mathrm{height}$$` * __Horizontal rule__ *** * __Hyperlinks__ + Learn more about LaTeX at this [link](http://www.highpoint.edu/physics/files/2014/08/short-math-guide.pdf). ] --- # Insert images .pull-left[ Text in editor: <img src="img/screenshot_images_insert.png" width="80%" height="100%"> ] .pull-right[ Output: Gauss and the normal distribution were featured on the 10 Deutsch Mark (DM) bill.  <!-- The alternate text only appears if the image fails to load. --> <!-- By the way, this is how you write comments in markdown!! --> You can also source an image on the internet instead:  <!-- <img src="https://history.info/wp-content/uploads/2015/06/DEU-10m-anv.jpg"> --> ] --- # Tables created manually Later we will use R code to create tables from data. We can create tables using Markdown as well: .pull-left[ Text in editor: <img src="img/screenshot_manual_table.png" width="100%" height="100%"> ] .pull-right[ Output: <img src="img/screenshot_manual_table_out.png" width="100%" height="100%"> <!-- Variable | n | Mean `\(\pm\)` SE --> <!-- ---------|-----|-------------- --> <!-- Age | 198 | 42.3 `\(\pm\)` 3.1 years --> <!-- Height | 194 | 68.1 `\(\pm\)` 2.6 in --> ] * We **do not recommend** creating tables where the numbers are hard-coded * since they are **not reproducible**! --- # Spell check Alas, there are no autmatik sepll chekc to katch you're tipos and grammR. * You can manually do a spell check by clicking on the <img src="img/icon_spellcheck.png"> icon above the editor window. * There is no built-in grammar check in RStudio. + The [`gramr` package](https://ropenscilabs.github.io/gramr/) is an available RStudio Addin. --- # Practice! .pull-left[ Create an .Rmd file with file name `example1.Rmd` that creates the html output to the right. * Hint: The first line is not a header. ] .pull-right[ <center><img src="img/screenshot_example1.png" width="32%" height="50%"></center> ] --- class: middle, inverse # 3 types of R Markdown content 1. Text 2. <span style="color:darkorange"> *Code chunks*</span> 3. YAML metadata --- # Data description: Fisher's (or Anderson's) Iris data set * n = 150 * 3 species of Iris flowers (Setosa, Virginica, and Versicolour) + 50 measurements of each type of Iris * variables: + sepal length, sepal width, petal length, petal width, and species _Can the flower species be determined by these variables?_ <center><img src="img/Iris_types.png" width="70%" height="50%"><img src="img/Iris_parts.png" width="28%" height="50%"></center> [Gareth Duffy](https://github.com/Datagatherer2357/Gareth-Duffy-GMIT-Project) --- # Code chunks Chunks of R code start with ` ```{r} ` and end with ` ``` `. For example, the chunk <img src="img/screenshot_summary_iris.png" width="15%" height="50%"> produces the output ```r summary(iris) ``` ``` Sepal.Length Sepal.Width Petal.Length Petal.Width Min. :4.300 Min. :2.000 Min. :1.000 Min. :0.100 1st Qu.:5.100 1st Qu.:2.800 1st Qu.:1.600 1st Qu.:0.300 Median :5.800 Median :3.000 Median :4.350 Median :1.300 Mean :5.843 Mean :3.057 Mean :3.758 Mean :1.199 3rd Qu.:6.400 3rd Qu.:3.300 3rd Qu.:5.100 3rd Qu.:1.800 Max. :7.900 Max. :4.400 Max. :6.900 Max. :2.500 Species setosa :50 versicolor:50 virginica :50 ``` --- # Create a code chunk Code chunks can be created by either 1. Clicking on  `\(\rightarrow\)`  at top right of editor window, or 1. __Keyboard shortcut__ * Mac: _Command + Option + I_ * PC: _Ctrl + Alt + I_ --- # Chunk options- most common .pull-left-40[ Text in editor: <img src="img/screenshot_chunks_common.png" width="100%" height="100%"> ] .pull-right-60[ No options specified: see both code and output ```r mean(iris$Sepal.Length) ``` ``` [1] 5.843333 ``` __`echo`__ determines whether the R code is __displayed__ or not. The default is `TRUE`. When set to `FALSE`, the code is not displayed in the output: ``` [1] 5.843333 ``` __`eval`__ determines whether the R code is __run__ or not. The default is `TRUE`. When set to `FALSE`, the code is not run but is displayed in the output: ```r mean(iris$Sepal.Length) ``` ] --- # More chunk options .pull-left-40[ Text in editor: <img src="img/screenshot_chunks_include.png" width="100%" height="100%"> ] .pull-right-60[ Output: __`include`__ determines whether to include the R chunk in the output or not. The default is `TRUE`. When set to `FALSE`, the chunk is run but we do not see the code or its output (note that nothing is displayed below): ] * Setting `include=FALSE` is useful when you have R code that you want to run, but do not want to display either the code or its output. * See the [R Markdown cheatsheet](https://www.rstudio.com/wp-content/uploads/2016/03/rmarkdown-cheatsheet-2.0.pdf) for more chunk options. --- # Inline code * You can also report R code output inline with the text * _R code is not shown in this case_ .pull-left[ Text in editor: <img src="img/screenshot_code_inline.png" width="100%" height="100%"> ] .pull-right[ Output: The mean sepal length for all 3 species combined is 5.8 (SD = 0.8) cm. ] * The code above is an example of where `include=FALSE` is used a chunk option to evaluate the code but not show the code or its output. + It saves the mean as `mean_SepalLength`, which can then be used later on. * For the standard deviation, the inline code did the calculation. * Thus it was not necessary to first save the mean as a variable. --- # Figures .pull-left[ Text in editor: <img src="img/screenshot_ggplot.png" width="100%" height="100%"> * Figure dimensions specified with `fig.width` and `fig.height` * Figure name specified by the chunk label * The figure created by the chunk above is called `Sepal_WidthVsHeight-1.png` * _Chunk names must be unique!_ * `echo=FALSE` was used to hide the code and only display the figure ] .pull-right[ Output: <img src="03_rmarkdown_slides_files/figure-html/Sepal_WidthVsHeight-1.png" style="display: block; margin: auto;" /> ] --- # Tables - with no formatting * Below we create a summary table with the mean and SD of sepal lengths * The table is displayed with no special formatting ```r table_sepal_length <- iris %>% group_by(Species) %>% summarize(mean = mean(Sepal.Length), SD = sd(Sepal.Length)) table_sepal_length ``` ``` # A tibble: 3 x 3 Species mean SD <fct> <dbl> <dbl> 1 setosa 5.01 0.352 2 versicolor 5.94 0.516 3 virginica 6.59 0.636 ``` --- # Tables - with `kable` * The `kable` command from the `knitr` package has some basic formatting options + __html__ tables: harder to read due to squished spacing; can include caption + __markdown__ tables: nicer formatting; width = page width .pull-left[ Text in editor: <img src="img/screenshot_kable_code.png" width="87%" height="100%"> ] .pull-right[ Output: <img src="img/screenshot_kable_out.png" width="80%" height="100%"> ] --- # Tables - use `kableExtra` for more formatting options .pull-left-60[ Text in editor: <img src="img/screenshot_kableExtra_code.png" width="100%" height="100%"> ] .pull-right-40[ Output: <img src="img/screenshot_kableExtra_out.png" width="66%" height="100%"> ] See [Hao Zhu's webpage](https://haozhu233.github.io/kableExtra/awesome_table_in_html.html) for many, many more `kableExtra` options. --- # Global chunk options * You can set __global chunk options__ that are __applied to all chunks__ in the .Rmd file * Set global options in a chunk at the beginning of the .Rmd file * The template .Rmd file already includes a chunk labeled `setup` * Add more options as desired to this chunk * Options are added within the `knitr::opts_chunk$set(...)` command * Any of the many chunk options can be set in the `setup` chunk <center><img src="img/screenshot_global_options.png" width="80%" height="90%"></center> * `fig.path` sets the folder name where figures generated by the .Rmd file will be saved * See the [R Markdown cheatsheet](https://www.rstudio.com/wp-content/uploads/2016/03/rmarkdown-cheatsheet-2.0.pdf) for more chunk options. --- # Practice! (part 1) .pull-left[ Edit the file `example2/example2.Rmd` to create html output that matches `example2/example2_output.html` shown below. <img src="img/screenshot_example2_part1.png" width="85%" height="100%"> ] .pull-right[ <img src="img/screenshot_example2_part2.png" width="75%" height="100%"> ] --- # Practice! (part 2) Create the table output shown below and at the end of `example2/example2_output.html` (code [link](https://haozhu233.github.io/kableExtra/awesome_table_in_html.html)) <img src="img/screenshot_example2_part3.png" width="100%" height="100%"> --- class: middle, inverse # 3 types of R Markdown content 1. Text 2. Code chunks 3. <span style="color:darkorange"> *YAML metadata*</span> --- # YAML metadata Many output options can be set in the __YAML metadata__, which is the _first set of code in the file starting and ending with_ `---`. * YAML is an acronym for *YAML Ain't Markup Language* * It sets the configuration specifications for the output file * For more details about YAML in general, see the [YAML Wikipedia](https://en.wikipedia.org/wiki/YAML) page *** Set the __title__, __author__, and __date__ that appear at the top of the output file .pull-left[ Text in editor: <img src="img/screenshot_YAML_top.png" width="90%" height="100%"> ] .pull-right[ Output: <img src="img/screenshot_YAML_top_out.png" width="100%" height="100%"> ] --- # Numbered sections & clickable table of contents .pull-left-40[ Text in editor: (`example3a.Rmd`) <img src="img/screenshot_YAML_TOC_code.png" width="100%" height="100%"> Try out `collapsed: yes` and `smooth_scroll: no` ] .pull-right-60[ Output: (`example3a.html`) <img src="img/screenshot_YAML_TOC_out.png" width="100%" height="100%"> ] --- # Themes * There are 12 themes to choose from without installing additional packages * See http://www.datadreaming.org/post/r-markdown-theme-gallery/ for examples .pull-left-40[ Text in editor: (`example3b.Rmd`) <img src="img/screenshot_YAML_theme_code.png" width="100%" height="100%"> ] .pull-right-60[ Output: (`example3b.html`) <img src="img/screenshot_YAML_theme_out.png" width="100%" height="100%"> ] --- # Code folding * Code folding creates buttons in the output html file that lets users choose whether they want to see the R code or not * This only applies to R code from chunks with `echo = TRUE` * `code_folding: hide` all R code hidden by default; user must click Code button to see R * `code_folding: show` all R code shown by default; user must click Code button to hide R * See https://bookdown.org/yihui/rmarkdown/html-document.html#code-folding for more info <img src="img/screenshot_YAML_codefold.png" width="100%" height="100%"> --- # Word documents .pull-left-40[ * Not many YAML options * Cannot include html code or html-specific commands Text in editor: (`Word_example3.Rmd`) <img src="img/screenshot_YAML_Word_code.png" width="100%" height="100%"> ] .pull-right-60[ Output: (`Word_example3.docx`) <img src="img/screenshot_YAML_Word_out.png" width="90%" height="100%"> ] --- # Word documents - tables options limited * Cannot use `kableExtra` package options * `kable` can be used <center><img src="img/screenshot_YAML_Word_tables_out.png" width="75%" height="100%"></center> --- # Word documents - using a style file .pull-left-40[ * Create a Word doc with preferred formatting * font types and sizes, margins, header colors, etc. YAML with code to include style file: <img src="img/screenshot_YAML_Word_style_code.png" width="100%" height="100%"> ] .pull-right-60[ Sample style file: (`word-styles-reference.docx`) <center><img src="img/screenshot_word_template.png" width="100%" height="100%"></center> ] The Word doc created by RStudio will have the same formatting as the specified style file. --- # pdf documents Producing pdf documents requires that [LaTeX](https://www.latex-project.org/get/) be installed on your computer .pull-left[ * Few YAML options * Lots of table options, including kableExtra * Can use LaTeX code for formatting <img src="img/screenshot_YAML_pdf_code.png" width="75%" height="75%"> See `pdf_example3.Rmd` for code and `pdf_example3.pdf` for output. ] .pull-right[ <center><img src="img/screenshot_YAML_pdf_out.png" width="60%" height="100%"></center> ] --- # Practice! Change the YAML of `example2/example2.Rmd` to 1. Add your name as author 1. Produce a Word document or a pdf document --- class: center, middle, inverse # Extensions and Tips --- # Real time knitting: `xaringan::inf_mr()` Instead of clicking "Knit" every time to see your updated document output, try this: After installing the `xaringan` package, `.Rmd` files can be run and rendered "live" as you type/save when you either run ```r xaringan::inf_mr() ``` in the console when your `.Rmd` file is open. *Or,* click on on Adddins (top of screen), scroll down to "Xaringan" and click on "Infinite Moon Reader" This is a new feature, so you need the most recent version of `xaringan` and RStudio. It works well for `html_document` output. --- class: center, middle, inverse # Reproducible Workflow --- # Be Organized Your files must make sense to yourself 6 months from now, and/or other collaborators. <center><img src="img/jenny_filesalad.png" width="90%" height="50%"></center>[Jenny Bryan's "What They Forgot to Teach you About R" RStudio::conf2018 training](https://github.com/jennybc/what-they-forgot) --- # No! Absolute! File! Paths! (don't `setwd()`) Absolute paths `\(\neq\)` reproducible Relative paths `\(=\)` reproducible (if done correctly) <center><img src="img/jenny_filepath.png" width="80%" height="50%"></center> [Jenny Bryan](https://jennybryan.org/about/)'s oft quoted opinion; see post on [Project-oriented workflow](https://www.tidyverse.org/articles/2017/12/workflow-vs-script/) --- # Project directory structure - The .Rproj file sets your working/home directory (**USE [PROJECTS](https://www.tidyverse.org/articles/2017/12/workflow-vs-script/)**) ```r # Use a relative path, "relative to" the project folder read_csv("mydata.csv") # looks in .Rproj folder ``` - When .Rmd files knit, they look for sourced files *in the folder they live in* ```` ```{r data, eval=TRUE} read_csv("mydata.csv") # looks in .Rmd's folder ``` ```` - It's good practice to organize all your code/data/output into separate folders These three facts together can cause a headache. * Enter `here::here()`! --- # Everything in one folder <img src="img/report2_same_folder_input.png" width="80%" height="60%"> After knitting, this gives you (file 🥗) <img src="img/report2_same_folder_inputandoutput.png" width="80%" height="60%"> --- # Slightly more organized <img src="img/report3_subfolder_input.png" width="70%" height="60%"> After knitting, this gives you: <img src="img/report3_subfolder_inputandoutput.png" width="70%" height="60%"> --- # Dot dot: A tip about "moving up" a directory/folder - In unix, to point to the folder one level up (it contains the folder you're in), use `..` or `../` - As in `cd ..` moves up one directory, - or `cp ../myfile.txt newfile.txt` copies a file one level up into the current folder (working directory) - In `.Rmd` when you want to source the data in the `data/` folder, you could use `..` to move up a folder into the main directory, and then back down into the `data/` folder: ```r # From the .Rmd folder, move up one folder then down to the data folder mydata <- read_csv("../data/report3_nhanes_data.csv") ``` <img src="img/report3_subfolder_input.png" width="70%" height="60%"> --- # Find the `..` confusing? Use `here::here()`! <center><img src="img/horst_here.png" width="50%" height="50%"><a href="https://github.com/allisonhorst/stats-illustrations"><br>Allison Horst</a></center> --- # `here::here()` `\(\rightarrow\)` relative paths to the project directory - The `here` package's `here()` function solves this issue of inconsistent working directories. - The point of RStudio project workflow is to always have the same "home" working directory = where the `.Rproj` file is. - `here::here()` returns the project directory as a string - Fully reproducible if the whole folder is moved or shared or posted to github - Portable to ALL systems (Mac, PC, unix), don't worry about `/` (Mac) or `\` (PC) or spaces etc ```r here::here() ``` ``` [1] "/Users/minnier/Google Drive/BERD R Classes/berd_r_courses_github" ``` --- # `here::here()` with folders and filenames - `here::here("folder","filename")` returns the entire file path as a string - These file paths work when running a `.Rmd` file interactively like a notebook, when knitting it, when copying it to the console, wherever, whenever!! ```r here::here("data","mydatafile.csv") ``` ``` [1] "/Users/minnier/Google Drive/BERD R Classes/berd_r_courses_github/data/mydatafile.csv" ``` ```r here::here("data","raw-data","mydatafile.csv") ``` ``` [1] "/Users/minnier/Google Drive/BERD R Classes/berd_r_courses_github/data/raw-data/mydatafile.csv" ``` We will explore how and when to use this in the exercises. --- # Practice! Within your project folder, open this file and follow the instructions: - `example4/example4.Rmd` --- class: center, middle, inverse # More Extensions and Tips --- # Even more organized: child documents If you want to have separate `.Rmd` files that are sourced in one large document, you can have ["child document chunks"](https://yihui.name/knitr/demo/child/): .pull-left-40[ A file called `report_prelim.Rmd` in the `analysis/` folder (No YAML): ```` # Details about experiment Here are some details. I can make a plot, too. ```{r plotstuff} plot(x,y) ``` ```` ] .pull-right-60[ In the main doc `main_doc.Rmd` ```` --- title: "Main Report: output: html_document --- # Preliminary Analysis ```{r child = here("analysis","report_prelim.Rmd")} ``` # Conclusion ```{r} kable(summarytable) ``` ```` ] --- # Make presentation slides - These slides were made using a `.Rmd` file with the `xaringan` package! - Simple templates can be found in `File -> new File -> R Markdown -> Presentation ` .pull-left[ - Each type of presentation uses different syntax to start a new slide, such as + ```# Slide Header``` , or + ```---``` - [ioslides](https://bookdown.org/yihui/rmarkdown/ioslides-presentation.html) and [Slidy](https://bookdown.org/yihui/rmarkdown/slidy-presentation.html) are html slides; simple options - [Beamer](https://bookdown.org/yihui/rmarkdown/beamer-presentation.html) is from LaTeX - [Xaringan](https://bookdown.org/yihui/rmarkdown/xaringan.html) is html based on java script remark.js; has the most flexibility for customizing slides - [PowerPoint](https://bookdown.org/yihui/rmarkdown/powerpoint-presentation.html) is in the newest RStudio release; can use custom templates ] .pull-right[ <img src="img/new_rmd_pres.png" width="100%" align="top"> ] --- # Presentations Practice! Open `example4/example4_pres.Rmd` and follow instructions. Bonus: Try using `xaringan::inf_mr()` to update the output in real time. --- # Tabsets A nice feature for showing multiple images or sections is with [tabbed sections](https://bookdown.org/yihui/rmarkdown/html-document.html): .pull-left[ ```` ## Results {.tabset} ### By Species ```{r} ggplot(iris, aes(x=Sepal.Length, y=Sepal.Width, color=Species))+ geom_point() ``` ### Panel Species ```{r} ggplot(iris, aes(x=Sepal.Length, y=Sepal.Width, color=Species))+ geom_point()+ facet_wrap(~Species) ``` ```` ] .pull-right[ 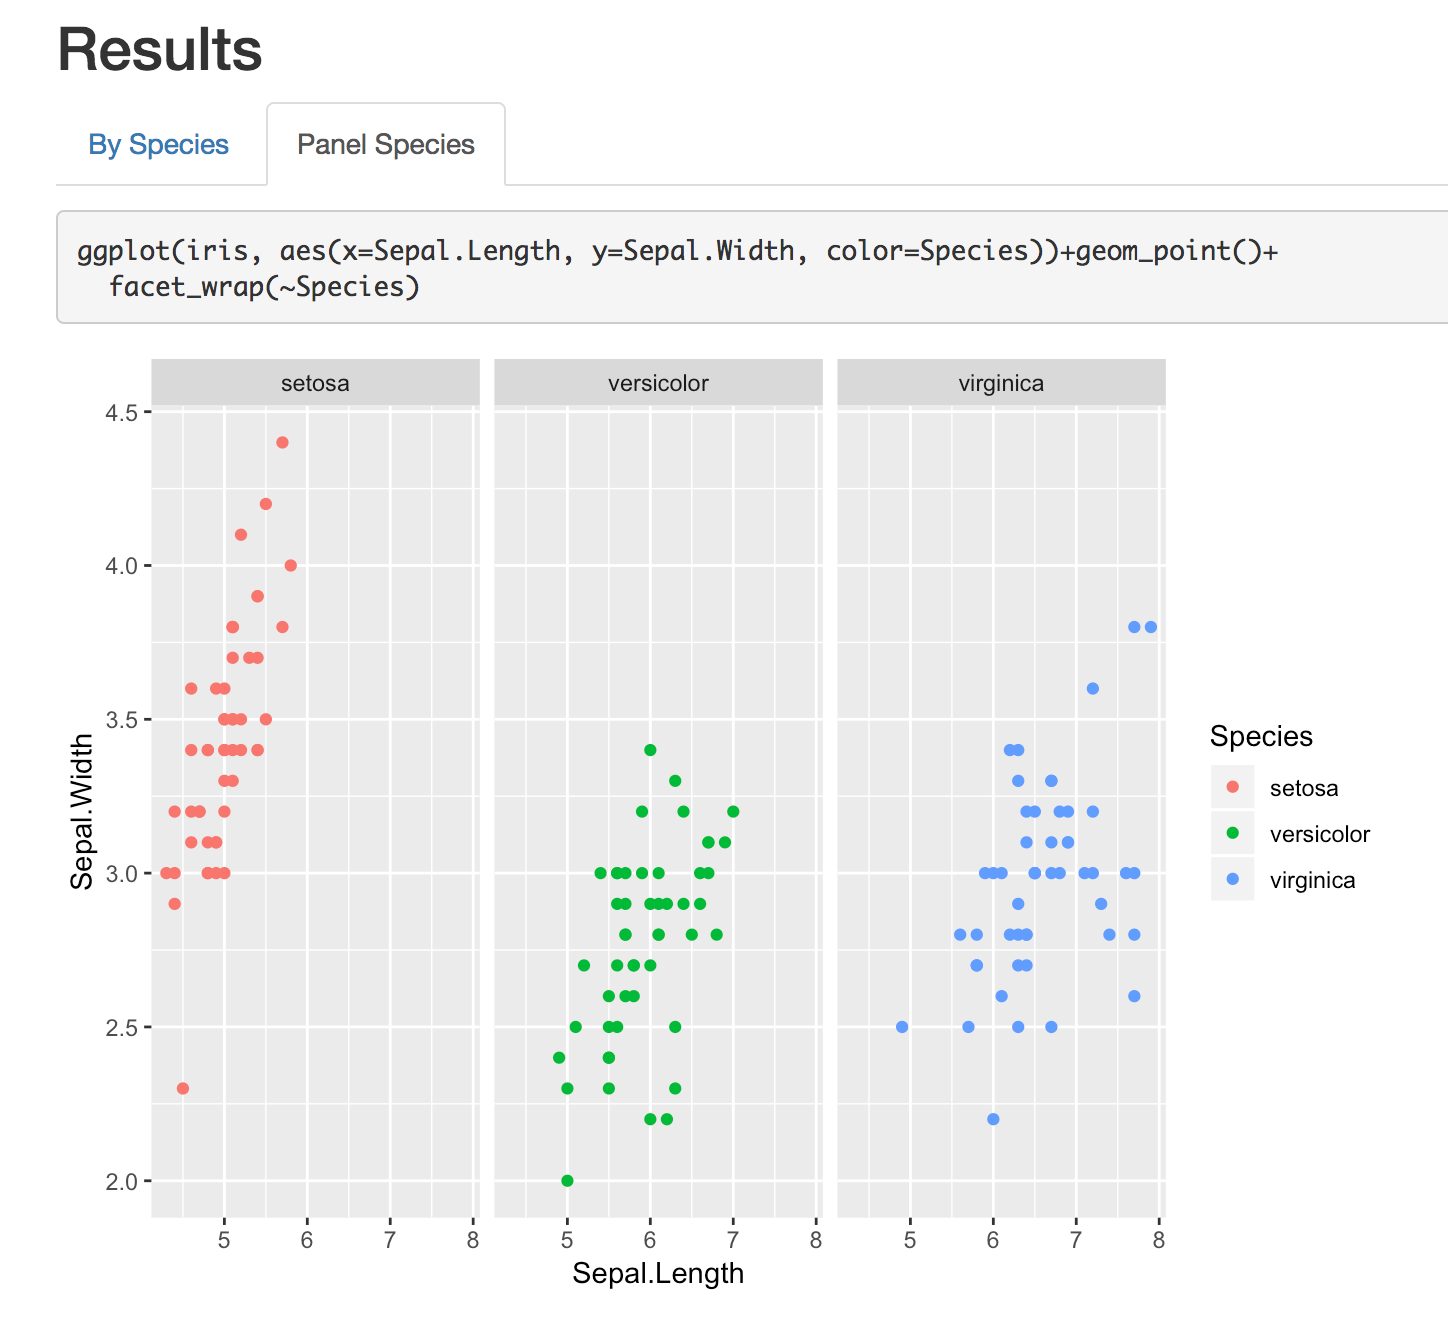 ] --- # Using other programming languages - RStudio can run [multiple programming languages](https://bookdown.org/yihui/rmarkdown/language-engines.html) in the same `.Rmd` (if they are installed on the computer), including SAS, STATA, and python. - For more on how to use STATA and SAS, for example, see the documentation for these packages: + [StataMarkdown](https://www.ssc.wisc.edu/~hemken/Stataworkshops/Stata%20and%20R%20Markdown/StataMarkdown) + [SASMarkdown](https://www.ssc.wisc.edu/~hemken/SASworkshops/Markdown/SASmarkdown.html) ```r names(knitr::knit_engines$get()) ``` ``` [1] "awk" "bash" "coffee" "gawk" "groovy" "haskell" [7] "lein" "mysql" "node" "octave" "perl" "psql" [13] "Rscript" "ruby" "sas" "scala" "sed" "sh" [19] "stata" "zsh" "highlight" "Rcpp" "tikz" "dot" [25] "c" "fortran" "fortran95" "asy" "cat" "asis" [31] "stan" "block" "block2" "js" "css" "sql" [37] "go" "python" "julia" "sass" "scss" ``` --- # Other languages: Limitations .pull-left[ - Each code chunk is run separately as a batch job when using other languages, so it's tricky to pass on objects/data to later code chunks. - Easy way: + Use one language to clean data & save the cleaned data as a file + source the file and continue in another language. - Other packages can be loaded that help to link objects from various languages, i.e. + [reticulate](https://rstudio.github.io/reticulate/articles/r_markdown.html) can store objects created by python code for use in R + StataMarkdown and SASMarkdown use chunk option [`collectcode=TRUE` to save code output](https://www.ssc.wisc.edu/~hemken/Stataworkshops/Stata%20and%20R%20Markdown/StataProfile.html). ] .pull-right[ ```` ```{r setup} library(SASmarkdown) ``` ```{sas clean_data, collectcode=TRUE} /* clean data with SAS code */ /* export to file */ ``` ```{sas analyze_data} /* analyze data from above code */ ``` ```{r analyze_data} # source clean data file and run code ``` ```` ] --- # Knit other types of output - Journal articles, custom [templates](https://bookdown.org/yihui/rmarkdown/document-templates.html) + File `\(\rightarrow\)` New File `\(\rightarrow\)` R Markdown `\(\rightarrow\)` From template - Dashboards: [flexdashboard](https://rmarkdown.rstudio.com/flexdashboard/) report output - Interactive reports with [shiny](https://shiny.rstudio.com/) - Interactive tutorials with [learnr](https://rstudio.github.io/learnr/) - Websites: [blogdown](https://bookdown.org/yihui/blogdown/) - Books: [bookdown](https://bookdown.org/) - Posters: [posterdown](https://github.com/brentthorne/posterdown) - Grad school theses: [thesisdown](https://github.com/ismayc/thesisdown) - It's really endless.... --- # `rmarkdown::render()` It can sometimes be easier to set options and change output files/locations when using the `render()` function in the `rmarkdown` package. This is also useful for rendering multiple documents in a batch, or using [parameterized reports](#param). In a `.R` file, or in the console, run commands to knit the documents: ```r library(rmarkdown) render("report1.Rmd") # Render in a directory render(here::here("report3","report3.Rmd")) # Render a single format render("report1.Rmd", output_format = "html_document") # Render multiple formats render("report1.Rmd", output_format = c("html_document", "pdf_document")) # Render to a different file name or folder render("report1.Rmd", output_format = "html_document", output_file = "output/report1_2019_07_18.html") ``` --- # `knitr::purl()` `\(\rightarrow\)` `.R` file Run in the console or keep in a separate R file to extract all the R code into a `.R` file. ```r # makes an R file report1.R in same director knitr::purl("report1.Rmd") # Can be more specific with output knitr::purl(here::here("report3","report3.Rmd"), # Rmd location out = here::here("report3","report3_code_only.R")) # R output location ``` --- # `knitr::knit_exit()`: End document early - Exit the document early. - Place this in your `.Rmd` to end document there and ignore the rest. - Run parts of the document at a time ```` ```{r} knitr::knit_exit() ``` ```` --- name: param # Parameterized Reports .pull-left[ ```` --- title: My Report output: html_document params: data: file.csv printcode: TRUE year: 2018 --- ```{r setup, include=FALSE} knitr::opts_chunk$set( echo = params$printcode ) ``` ```{r} mydata <- read_csv(params$data) mydata <- mydata %>% filter(year==params$year) ``` ```` ] .pull-right[ - Use the Knit button and you will be prompted for values - Use `rmarkdown::render` (default values are set in YAML) - See [chapter in R Markdown book](https://bookdown.org/yihui/rmarkdown/parameterized-reports.html) for details ```r rmarkdown::render( "myreport.Rmd", * params = list(data = "newfile.csv", year = "2019", printcode = FALSE), output_file = "report2019_newfile.html" ) ``` ] --- # Many more bonus tips - Use [git and github](https://happygitwithr.com/) for version control, and use output format [github_document](https://rmarkdown.rstudio.com/github_document_format.html) - see an [example](https://github.com/jminnier/nhanes_cvd/blob/master/report_annotated.md) - Quickly convert `.R` files to `.html` with the [notebook/compile button](https://support.rstudio.com/hc/en-us/articles/200552276-Creating-Notebooks-from-R-Scripts) or `knitr::spin()` - Include [HTML headers or Latex preambles](https://slides.yihui.name/2019-rstudio-conf-rmarkdown-workshop.html#75) and files for definitions in YAML - Add references and a [bibliography](https://slides.yihui.name/2019-rstudio-conf-rmarkdown-workshop.html#61) with BibTex `.bib` files - Similar to `.Rmd` are RStudio ["notebooks"](https://bookdown.org/yihui/rmarkdown/notebook.html) -- like an `.Rmd` but all the output is saved as it is run in the notebook. - Publish rendered html on [Rpubs](https://rpubs.com/) with Publish button, or through [github + netlify](https://bookdown.org/yihui/rmarkdown/blogdown-deploy.html). - [Look at these slides by Alison Hill](https://arm.rbind.io/slides/xaringan.html#1) and [these by Yihui Xie](https://slides.yihui.name/2019-rstudio-conf-rmarkdown-workshop.html) for many, many more tips and examples --- # References - [RStudio's R Markdown lessons](https://rmarkdown.rstudio.com/lesson-1.html) - Xie Y. et al [R Markdown: The Definitive Guide](https://bookdown.org/yihui/rmarkdown/) book online - [Explanation of difference between knitr/Rmd/pandoc](https://stackoverflow.com/questions/40563479/relationship-between-r-markdown-knitr-pandoc-and-bookdown) - [Teach data science: Getting started with R Markdown](https://teachdatascience.com/rmarkdown/) - Alison Hill & Yihui Xie's [Advanced R Markdown Workshop Materials](https://arm.rbind.io/days/day1/) - [UCLA's Intro to R Markdown slides](https://stats.idre.ucla.edu/stat/data/rmarkdown/rmarkdown_seminar.html) - [Software Carpentry Learning R Markdown Materials](https://swcarpentry.github.io/r-novice-gapminder/15-knitr-markdown/index.html) ## Cheatsheets: - [R Markdown cheatsheet](https://github.com/rstudio/cheatsheets/raw/master/rmarkdown-2.0.pdf) - [R Markdown reference guide](https://www.rstudio.com/wp-content/uploads/2015/03/rmarkdown-reference.pdf) --- # Possible Future Workshop Topics? - tables - ggplot2 visualization - advanced tidyverse: functions, purrr (apply/map) - statistical modeling in R ## Contact info: - Jessica Minnier: _minnier@ohsu.edu_ - Meike Niederhausen: _niederha@ohsu.edu_ ## This workshop info: - Code for these slides are on github, with links to other course materials: [jminnier/berd_r_courses](https://github.com/jminnier/berd_r_courses) - The `.Rmd` file that generated the slides is on [github](https://github.com/jminnier/berd_r_courses/blob/master/03-rmarkdown/03_rmarkdown_slides.Rmd) and can be downloaded [here](https://jminnier-berd-r-courses.netlify.com/03-rmarkdown/03_rmarkdown_slides.Rmd), though you need to download the whole [R project](https://github.com/jminnier/berd_r_courses/archive/master.zip) to knit the file. - The project folder of examples can be downloaded at [github.com/jminnier/berd_rmarkdown_project](https://github.com/jminnier/berd_rmarkdown_project) & the solutions are in the `solns/` folder. <!-- TO DO: move all images to project folder so print pdf below works? -->